Ingredient No-Churn Oreo Ice Cream: Your Quick & Easy Recipe for Sweet Indulgence
Imagine a dessert so irresistibly creamy, wonderfully crunchy, and delightfully sweet that it becomes an instant family favorite. Now, imagine making it with just a handful of ingredients, no fancy equipment, and minimal fuss. That's precisely what awaits you with this incredible no-churn
homemade Oreo ice cream recipe. Forget about expensive ice cream makers or long, complicated processes; this is the ultimate shortcut to pure dessert bliss.
This isn't just an ice cream recipe; it's an experience. From the satisfying crunch of crushed Oreo cookies to the velvety smoothness of the cream base, every spoonful is a celebration of flavor and texture. It's the perfect treat for a warm summer evening, a special birthday, or simply a spontaneous moment of craving something truly extraordinary. Best of all, it's so easy that even novice home cooks – and eager little helpers – can whip it up with confidence, proving that some of life's greatest pleasures are often the simplest to create. Get ready to ditch the store-bought tubs and discover the magic of homemade cookies and cream!
Why You'll Fall in Love with This No-Churn Oreo Ice Cream Recipe
There's a reason why this particular
Oreo ice cream recipe has become a beloved staple in countless households, and it boils down to an unbeatable combination of convenience, flavor, and sheer fun. First and foremost, the
simplicity is unparalleled. We're talking about a mere three core ingredients and absolutely no specialized gadgets like an ice cream maker. All you need is a bowl, a hand mixer, and a spatula, making it accessible to anyone, regardless of their kitchen arsenal. This ease of preparation transforms dessert-making from a chore into a delightful activity.
Beyond the minimal effort, the resulting ice cream is truly a masterpiece. It strikes the perfect balance between a rich, creamy base and the delightful crunch of generous Oreo cookie pieces. Unlike some store-bought varieties where the cookies can turn soggy, this homemade version ensures those beloved chocolatey wafers retain their satisfying bite, adding a fantastic textural contrast to every mouthful. Furthermore, making it at home gives you complete control over the cookie-to-cream ratio, allowing you to tailor it exactly to your preference – because who doesn't want more cookies in their cookies and cream? It's a fantastic project to involve children or grandchildren, offering a quick, rewarding activity that culminates in a universally adored sweet treat. The quick prep time and hands-off freezing process mean less time supervising and more time anticipating the delicious outcome, solidifying its place as a perfect dessert for any occasion, from weeknight indulgence to celebratory gatherings.
The Magic Three: Essential Ingredients for Your Oreo Masterpiece
The secret to this heavenly no-churn dessert lies in its incredibly simple yet perfectly balanced ingredient list. You don't need a pantry full of obscure items; just three readily available components combine to create a symphony of flavor and texture.
*
Classic Oreo Cookies
These iconic sandwich cookies are, naturally, the star of our show. While you can experiment with different Oreo flavors for unique twists (more on that later!), the classic original provides that quintessential chocolatey crunch and distinctive cream filling that makes cookies and cream so irresistible. For this recipe, you'll want to crush a significant portion of them, aiming for a delightful mix of fine crumbs and larger chunks. This variation in texture is key to the ice cream's appeal, ensuring both a subtle cookie essence and satisfying bites of actual cookie. Don't forget to save a few extra for sprinkling on top before freezing – it adds a professional touch and an extra layer of crunch.
*
Sweetened Condensed Milk
This is the unsung hero of no-churn ice cream. Sweetened condensed milk is a thick, syrupy dairy product that has had most of its water removed and sugar added. It serves several vital functions in this recipe: it provides the necessary sweetness, contributes to the ice cream's smooth and creamy texture without the need for an ice cream maker, and acts as a binder. It's crucial to use *sweetened condensed milk*, not evaporated milk, which is unsweetened and will not yield the same result. The rich, dense nature of condensed milk is what helps achieve that luxurious mouthfeel we all crave in ice cream.
*
Cold Heavy Whipping Cream
The final crucial component is cold heavy whipping cream. Often referred to simply as heavy cream, it should have a minimum of 35% milkfat (or ideally higher, around 36-40%) to ensure it whips up properly and creates the desired rich, stable base. The *coldness* of the cream is paramount; colder cream whips faster and achieves stiffer, more stable peaks, which translates to a lighter, fluffier, and ultimately creamier ice cream. As you whip the heavy cream, it incorporates air, forming a light and airy base that, when combined with the sweetened condensed milk and Oreos, freezes into that dreamy, scoopable texture without turning into a solid block of ice.
Step-by-Step Guide to Your Dreamy Oreo Ice Cream
Creating this delightful no-churn Oreo ice cream is remarkably straightforward, requiring just a few simple steps. Follow this guide, and you'll be on your way to a homemade treat that rivals any store-bought version.
1.
Prepare Your Oreos
Begin by crushing your Oreo cookies. The goal is a mix of textures: some fine crumbs to infuse the cream with flavor, and some larger chunks for satisfying bites. The easiest way to do this is to place the cookies in a sturdy plastic freezer bag, seal it, and then use a rolling pin or even a heavy can from your pantry to smash them. Alternatively, for quicker and more uniform crushing, you can pulse them briefly in a food processor or blender. Set aside a small handful of crushed Oreos for topping later.
2.
Whip the Cream Mixture
In a large, chilled mixing bowl, pour in the very cold heavy whipping cream and the sweetened condensed milk. Using a hand mixer (or a stand mixer with the whisk attachment), start on a low speed to combine the two ingredients, then gradually increase the speed to high. Continue whipping until stiff peaks form. This means that when you lift the beaters, the cream mixture holds its shape firmly. Be careful not to overmix, as this can turn the cream grainy. The stiffness of the peaks is crucial for the final texture of your ice cream, as it ensures plenty of air is incorporated, preventing an icy consistency.
3.
Gently Fold in the Cookies
Once your cream mixture has reached stiff peaks, it's time to introduce the crushed Oreos. Pour the majority of your crushed cookies into the whipped cream base. Using a spatula, gently fold the cookies into the mixture. The key word here is "gently." You want to combine everything thoroughly enough so that the cookies are evenly distributed, but without deflating the airy, fluffy texture of the whipped cream. Over-mixing at this stage can lead to a denser, less creamy ice cream. Stir just until the cookie bits are incorporated throughout the white base.
4.
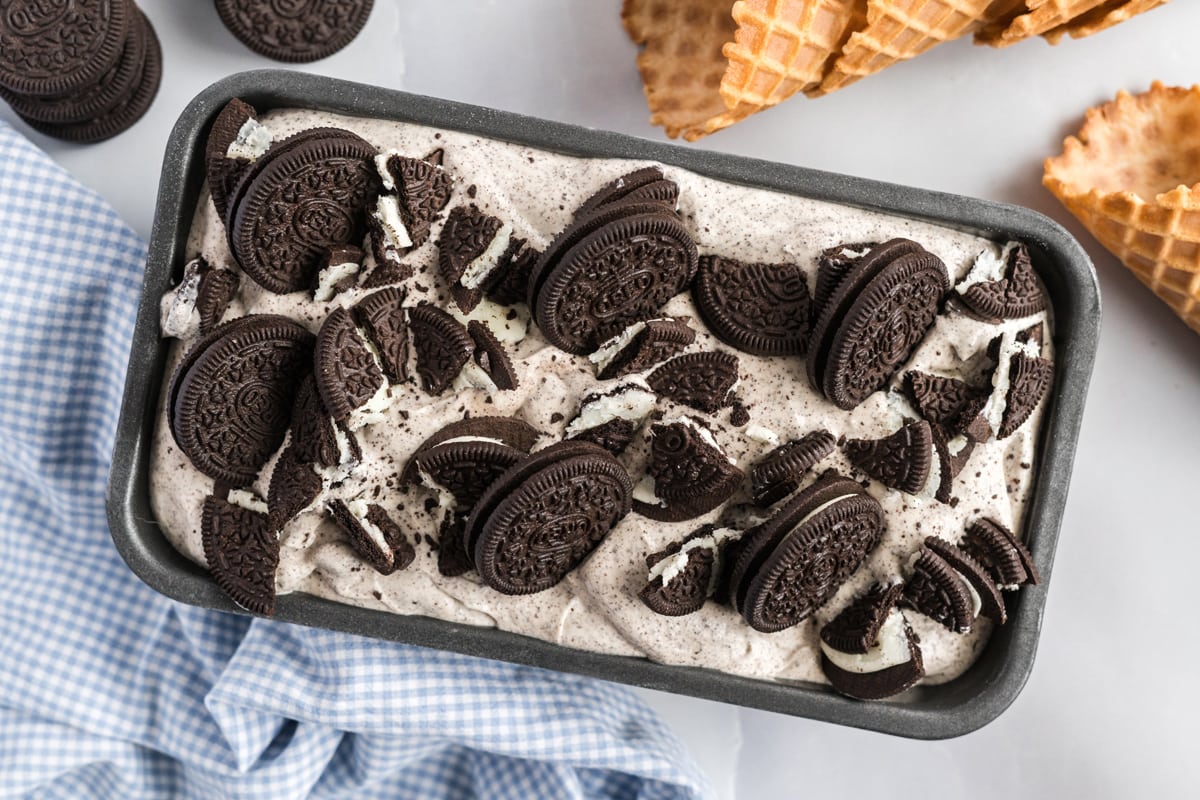
Freeze to Perfection
Carefully scoop the cookie-and-cream mixture into a three-pound loaf pan or an equivalent freezer-safe container. Smooth the top with your spatula. Now, take those reserved crushed Oreos and sprinkle them generously over the top of the mixture – this adds an extra layer of visual appeal and crunch. Cover the pan tightly with plastic wrap, pressing it directly onto the surface of the ice cream mixture to prevent ice crystals from forming. Place the pan in the freezer for a minimum of six hours, though overnight is often ideal for the firmest, most scoopable results. Once thoroughly frozen, your homemade Oreo ice cream is ready to be enjoyed!
Expert Tips for the Ultimate No-Churn Experience
While the no-churn
oreo ice cream recipe is inherently simple, a few expert tricks can elevate your results from good to absolutely phenomenal.
*
Keep Everything Extra Cold: This is arguably the most crucial tip. Ensure your heavy cream is straight from the coldest part of your refrigerator. For an even greater advantage, consider chilling your mixing bowl and beater attachments in the freezer for 10-15 minutes before you start. Cold equipment helps the heavy cream whip up faster, achieve stiffer peaks, and maintain its structure, all of which contribute to a smoother, fluffier final ice cream with fewer ice crystals.
*
Whip to Stiff Peaks – But Don't Overwhip: Achieving stiff peaks is essential for incorporating enough air to create that light, airy texture. However, once the peaks are stiff and hold their shape, stop mixing immediately. Overwhipping can cause the cream to separate and become grainy, leading to a less desirable texture.
*
Gentle Folding is Key: When incorporating the crushed Oreos (or any other mix-ins), use a light hand. The goal is to distribute the cookies without deflating the air you've painstakingly whipped into the cream. A gentle "cut and fold" motion with a spatula will help maintain the light and fluffy consistency.
*
Use High-Quality Heavy Whipping Cream: Look for heavy cream with at least 35% milkfat (often labeled as heavy cream or heavy whipping cream). The higher fat content is what allows it to whip up properly and provides the rich, creamy mouthfeel essential for delicious no-churn ice cream. Avoid using light cream or half-and-half, as they won't whip correctly.
*
Proper Freezing and Storage: Allow at least 6-8 hours for freezing, but overnight is always best for optimal firmness. When covering, press plastic wrap directly onto the surface of the ice cream mixture to create an airtight seal. This prevents ice crystals from forming on the surface and keeps your ice cream fresh. For storage, always use an airtight container to prevent freezer burn, and try to consume it within 1-2 weeks for the best quality.
*
For Easier Scooping: If your ice cream is rock-hard straight from the freezer, let it sit on the counter for 5-10 minutes before scooping. You can also dip your ice cream scoop in warm water for a few seconds; this makes slicing through the creamy texture much smoother.
Customizing Your Oreo Ice Cream Adventure
While the classic Oreo ice cream recipe is perfect in its simplicity, one of the greatest joys of making it at home is the freedom to customize and experiment! This basic no-churn method is an excellent canvas for culinary creativity.
*
Flavorful Oreo Variations:
Don't limit yourself to the classic! Explore other Oreo flavors like Mint Oreos for a refreshing twist, Golden Oreos for a vanilla-on-vanilla experience, Peanut Butter Oreos, or even seasonal varieties. Each one will bring a unique character to your ice cream.
*
Extra Mix-Ins and Swirls:
Want to take it up a notch? Before freezing, gently fold in additional ingredients alongside the crushed Oreos. Consider chocolate chips (milk, dark, or white), mini marshmallows, chopped nuts (walnuts, pecans, peanuts), sprinkles, or even chunks of your favorite candy bars. For a luscious swirl, drizzle in caramel sauce, hot fudge, or a raspberry puree and gently swirl with a knife after pouring into the loaf pan, but before adding the final Oreo topping.
*
Extracts for Added Depth:
A teaspoon of pure vanilla extract added to the cream mixture can enhance the overall flavor profile. For a holiday treat, a touch of peppermint extract pairs wonderfully with crushed Oreos. A pinch of espresso powder can also create a delightful mocha-oreo fusion.
*
Serve it Your Way:
Beyond just scooping it into a bowl, think about creative serving ideas! Turn it into an epic ice cream sundae with extra whipped cream, cherries, and drizzles of your favorite sauces. Blend it into a thick, creamy milkshake. Or, for a truly impressive dessert, use it to make homemade ice cream sandwiches by sandwiching a scoop between two soft cookies or brownies.
This no-churn Oreo ice cream recipe isn't just a dessert; it's an invitation to play, to create, and to discover your next favorite indulgence. The possibilities are truly endless, limited only by your imagination.
Indulge in Homemade Bliss Today!
There you have it – the comprehensive guide to making your own spectacular no-churn Oreo ice cream. This recipe isn't just about combining three ingredients; it's about crafting moments of pure joy, whether you're making it with family, impressing guests, or simply treating yourself to an undeniably delicious scoop. The unparalleled creaminess, the satisfying crunch of real Oreos, and the sheer simplicity of the process make this an absolute winner.
Why settle for anything less than homemade perfection when achieving it is so wonderfully easy? Say goodbye to icy, less flavorful store-bought options and embrace the rich, customizable goodness that comes straight from your kitchen. So, gather your ingredients, follow these simple steps, and prepare to be amazed. Your taste buds, and everyone you share it with, will thank you for bringing this quick and easy
Oreo ice cream recipe to life. Dive in and experience the magic of homemade sweetness!